The Ultimate Kasa Login Resource: Connecting to Your Smart Devices Quickly!
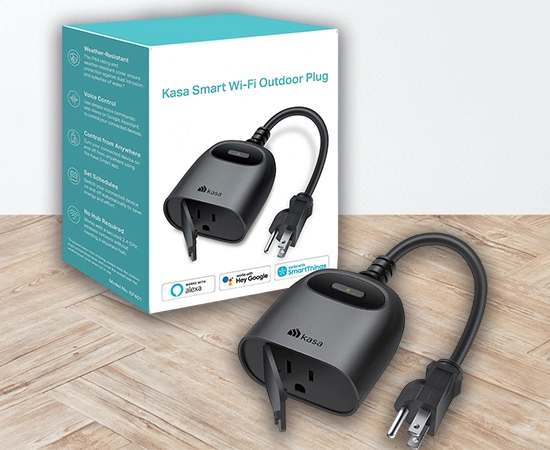
The brand-new TP-Link Kasa smart switches are one of the most excellent and innovative additions to your conventional light switches. These smart devices are capable enough to control and manage your smart home appliances remotely through a few clicks. If you want to explore the distinguishing features of this device, you must learn how to perform the Kasa Login.
Likewise, this guide sheds light on the step-by-step procedure to log into the TP-Link Kasa smart switch. Moreover, it gives you full flexibility and control to manage these smart gadgets using simple voice commands like Google Assistant, Alexa, etc. Stay tuned to learn Kasa Cloud Login in a few steps!
Getting Started With the Kasa Smart Login
Before diving into the complete Kasa login procedure, you must understand its basics. Generally, you need a few things to get your smart switches up and running effortlessly. These things may include a few items like a stable internet connection, an accurate web address/IP address, a valid TP-Link ID, a compatible device, and a Kasa Smart app.
When you are ready, all the aforementioned credentials and items, make sure you have a proper place to install your security camera. You can use the Kasa Smart app to access and configure your smart device. Before Kasa Home Login, you must create a Kasa Account using valid details. Let us explore the simple steps to create a TP-Link Kasa cloud account using the Kasa Smart app if you want to control your device remotely.
Creating the Kasa Account
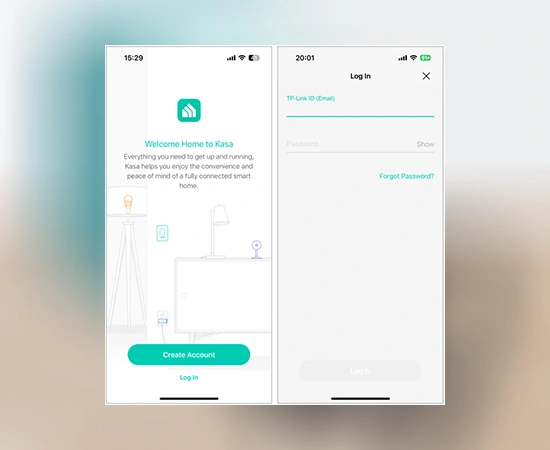
- Initially, download and install the Kasa Smart app on a compatible smartphone.
- Then, launch the app and you will reach the Welcome screen.
- Hereon, tap the “Create Account” option and enter your valid email address & password.
- Further, “read the terms of use” carefully and tap on the “Create Account” button.
- Now, an account activation link is sent to your entered email.
- Open your mailbox and complete the registration by tapping “Click to Finish Registration”.
- Next, verify your account details, and you can now access your Kasa smart device seamlessly.
- You can also skip this step if you are already verified.
- Finally, you can easily navigate to the Kasa Cloud Login portal and manage your smart device hassle-free.
Performing the TP Link Kasa Login Step-by-Step
Usually, the TP-Link Kasa switch is accessible through the Kasa Smart app. Unlike other TP-Link devices, you can’t access this smart gadget via a web interface. Before heading for the Kasa account login, make sure you have the latest version of the app and that it is compatible with your device. Next, ensure a 2.4 GHz wifi network on your smartphone. If you are a new owner of this smart gadget, follow these quick steps to get easy access to the Kasa Login panel.
Kasa App Login Process
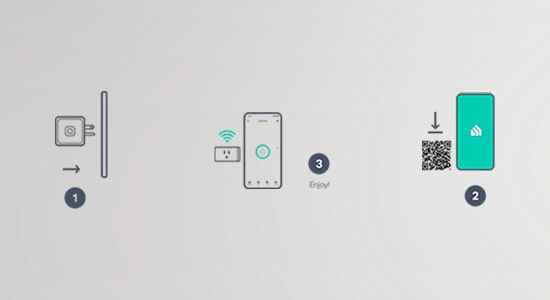
- First, plug your Kasa smart switch into a power outlet.
- Now, open the Kasa Smart app on your smartphone.
- Next, tap on “Log In” and enter your login details.
- Then, you will reach the administrative dashboard of the Kasa switch.
- Further, tap on the “+” icon and visit the “Add Device” page.
- Select “Smart Switches” and then choose your device model or name.
- Then, follow the on-screen instructions to use and operate your device accordingly.
- Ultimately, the Kasa app login is finished.
What Can I Do After the Kasa Home Login?
However, the Kasa Smart Login gives you full control over your smart home gadget. By logging into the Kasa smart switch, you can turn on and off your home fixtures in moments with remote connectivity. Additionally, you can perform multiple operations and configure various features according to your preferences. Have a quick look at what to do after a successful Kasa app login:
- Firstly, you can connect your Kasa smart switch to the home wifi network.
Note: Connecting your smart device to wifi is different for both iOS and Android devices. Therefore, you must follow suitable steps depending on your device.
- In Android devices, your device will automatically detect the wifi network.
- On the other hand, you need to enter the wifi network details manually in iOS devices.
- For that, go to Settings>Wi-Fi, choose your device, select SSID, and enter its password.
- Further, you can customize your device name and change the device icon.
- Moreover, you can remove your device from the app.
- Then, go to Device Info, change your WiFi Network settings, check Firmware details, device location, time, etc.
- Most importantly, you can now set up your devices with the voice assistant like Alexa, Amazon Echo, Google Assistant, etc., to leverage the great ease of use.
Kasa Login Failed? Here is What to Do?
It is quite normal if you encounter any issues during the Kasa account login. Several factors may create hurdles when accessing your smart device. These may include incorrect login details, app issues, wifi connectivity issues, or technical issues. Consequently, to get rid of all these issues, try the following expert tips:
- First and foremost, make sure your smartphone is working on the recommended 2.4 GHz network.
- Then, ensure that you have the Kasa Smart app with the latest version.
- Most importantly, verify that your devices are compatible with each other.
- Additionally, use a valid SSID and password and TP-Link ID for Kasa login.
- Certainly, power cycle your device to freshly start your smart device and eliminate technical issues.
- Then, remove all network barriers and physical obstructions like a microwave, a mirror, etc.
- Moreover, confirm that you have sufficient power supply and all the power gadgets are working fine.
- If you face any issues with the Kasa app login, restart the app and clear unwanted data.
- Further, force stop your device, or reinstall the app to complete the TP Link Kasa Login.
- In case you are facing frequent network connectivity issues, contact your ISPs.
In essence, you have now mastered the Kasa Login through this concise guide. If you want to know more about this device, let us know in our chat section.
FAQs
What is the Kasa smart login and password?
Usually, the Kasa smart app uses a valid TP-Link Kasa ID, which is associated with your registered email address and password. When you access your device through the Kasa Smart app, you must create this ID if you do not have one yet.
Can I access the Kasa smart switch on my PC?
No, you cannot access and configure the Kasa smart home switch on your PC directly. You need to use an emulator to access your device and then use the Kasa app to control your device.
Is there any difference between Kasa home login and Kasa cloud login?
No, both seem like the same process, where you need to enter the TP-Link account details to access and configure your device.